No Products in the Cart
- +254 705876661 / +254 728919719
- GUARANTEED ORDER PRODUCTION AND DELIVERY IN 48HRS
Meet Liz Corkery, a Sacramento-based artist who founded and runs Print Club., an online source for fine art silkscreen prints. Through Print Club, Liz works with other artists to create and sell limited edition works on paper, but she also has a deep love for cooking and entertaining so has combined those interests in this beautiful set of hand-printed napkins. For this Thanksgiving-inspired DIY she has partnered with talented Sacramento friends, who have beautifully documented the whole printing process.

Before you begin: The instructions on the fabric ink brand I used recommends that fabric be pre-washed prior to printing so hop to that before you dive into the printing process.
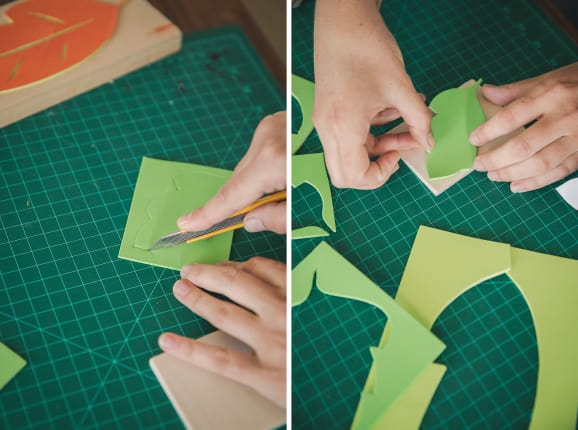
1. Cut your leaf shapes out of the foam sheets. At the bottom of this post, I have included a download of the leaf shapes we created for this project, but there is no right or wrong leaf. You can either just start cutting into the foam or if you prefer, trace out your design onto the back of the foam sheets and then cut. I would recommend having an array of sizes and shapes as it gives you the most flexibility when you're printing. Once they're cut, stick them to your blocks or plywood, and you're ready to ink.
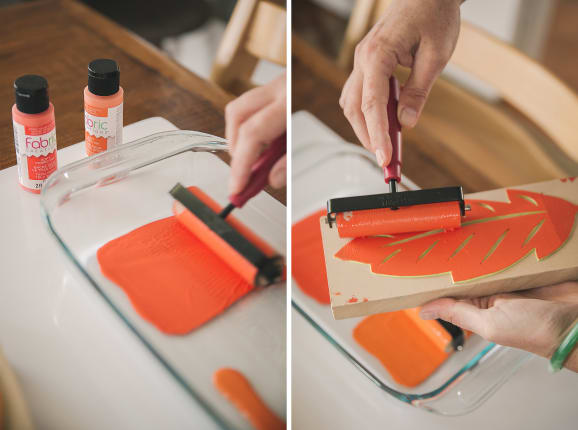

2. Ink up. Squirt a thin line of fabric ink at the top of your tray and use the brayer to roll out an even layer of the ink. Once it's fully distributed on the brayer, roll the ink onto your leaf block in an even, generous layer. Because of the texture of the fabric, you want to really stamp into the fibers so having a nice amount of ink on the block will give the best results. If you happen to get ink on the sides of the block, just wipe it back with a paper towel to avoid it printing onto the fabric. I had two colors going at once, but you can print one at a time to save the need for purchasing multiple brayers.
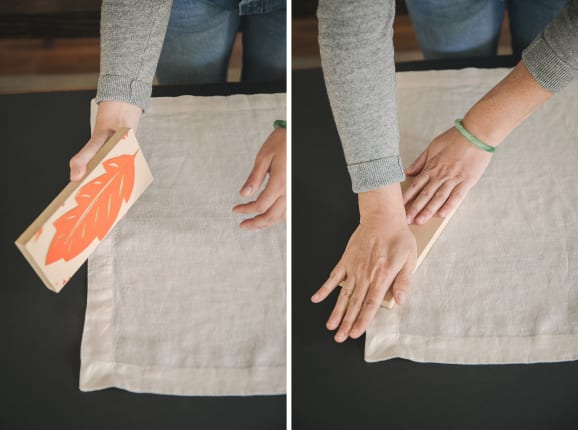

3. Print. After inking up your block, the next step is printing. Pick a spot on your napkin you want to start with and apply firm, even pressure. I would say really firm pressure depending on the texture of your napkin. Pull the block back up off of the fabric and admire your leafy impression. Ink up your next leaf and repeat. If space allows, I would print your whole set of napkins at once, printing one color at a time across each of them. The water-based fabric ink will dry relatively quickly so you can re-use the same blocks when you move on to your next color.


5. Dry & Finish. When printing on fabric, heat setting is always recommended for best durability. Allow your napkins to dry overnight then heat set the printed surface using a dry, hot iron and a pressing cloth. Lay pressing cloth over the stamped fabric and iron the stamped design for 30 seconds, lift the iron and move it to another section of the stamped design. Your iron should be set at the highest setting allowed for the decorated fabric, with no steam. Follow these steps and your guests won't wipe off your beautiful design when they're wiping pumpkin pie from the corner of their mouth.